
The Bee-Bot remains one of the most popular floor robots in use in special schools, being simple to use and robust. Some difficulty can arise with understanding the directional language and relative direction of the robot.
For students working at lower levels:
- Let students tinker with the robot, investigating the buttons and the idea of simple cause and effect.
- Create a grid or obstacles for the Bee-Bot based on a topic or story being studied in class. Pre-program the Bee-Bot to move around the grid and retell the story as it moves, or provide sensory feedback as it reaches obstacles – e.g. blow bubbles as it moves through a Bee-Bot car wash, spray water as it crosses a lake, crunch leaves in the forest etc.
- Students can enter a given program on the Bee-Bot by pressing the buttons in a sequence provide by the teacher or more able students.
For students starting to learn about programming:
- Practise the Bee-Bot moves as a class for each command – create a large grid on the floor for students to move around.
- Use laminated command cards, or use 3D printed arrows to plan out a program – this can be done without the Bee-Bot first then tested. This provides a record of the program that can be debugged or modified easily.
- You can have three different roles for students working at different levels in groups: the programmer (who plans out the program), the inputter (who presses the buttons in the sequence according to the program), and the debugger (who checks that the program worked and corrects any errors).
- See the Barefoot SEND Bee-Bot Basics activity for a lesson plan and the command cards (free login required).
Extending learning:
- Practise decomposition with a large grid or places to visit in a classroom. Each group or student takes responsibility for programming a section of the route. See the Barefoot Bee-Bot Route Decomposition activity (free login required).
- Create a dice or random rule generator: e.g. program the Bee-Bot to reach the correct square, but without turning right/in exactly 5 moves/avoiding the red squares etc.
- Sudents can design their own Bee-Bot grids and costumes around a theme, and challenge their peers to move around it.
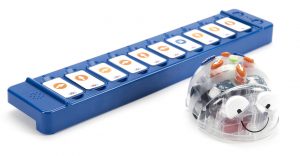
Blue-Bot
The Blue-Bot can be used in place of the Bee-Bot for any of the above activities. It is good for use with older students, as it looks less babyish. It’s main difference is that you can use it with an iPad app, which uses Bluetooth to communicate with the bot. The app can be used for planning out programs, setting challenges, and extending learning with loops and 45 degree turns.
TTS have also created the TacTile Reader for students to create the program using command tiles, which can then be sent to the Blue-Bot.
Pro-Bot
The Pro-Bot has all the functionality of the Bee-Bot, but in the form of a car. It also has a display where you can see the program being entered (in the form of Logo commands – useful for a bridging activity). You can use repeats on the Pro-Bot, and it also has a number of sensors – front and back touch sensor, light and sound sensor, which can be programmed. For example you can turn the car lights on when it goes through a tunnel, or program the car to reverse when it hits an obstacle.
For more ideas and guides see:
A great Pro-Bot Workbook from Ryan Hayes for students with SEND
Pro-Bot lesson plans: https://movemyrobot.blogspot.com/p/lesson-plan-hour-1-introduce-pro-bot.html
How to use light and sound sensors video: https://www.youtube.com/watch?v=oG9JEtXqy5o